How To Create A Blazor Application
So far, in our blog posts, we were mainly focused on creating the Blazor app by integrating it with the Blazorise library. This post will run you through the process of creating a new and basic Blazor application.
Blazor applications can be created using one of two ways.
- An Integrated Development Environment
- The .NET CLI
Requirements
Regardless of our choice, the tools below are a prerequisite
- .NET SDK
The .NET SDK installs all the tools and libraries to develop, debug, test and run your application
Currently the SDKs that are compatible with Blazor Applications are
- .NET 7 Currently available in preview
- .NET 6 LTS
- .NET 5 Not Supported
An Integrated Development Environment
A tool that is designed with the necessary tooling needed for the building, testing and deployment of code.
For code editors such as Visual Studio Code, running commands in the terminal uses the .NET CLI to produce the same results.
The .NET command-line interface (CLI) is a cross-platform toolchain for developing, building, running, and publishing .NET applications.
Types of Blazor Applications
There are two types of Blazor Applications.
- Blazor WebAssembly (WASM) is a client-side Blazor application that runs in the browser.
Read More About Blazor WebAssembly
- Blazor Server is a server-side application that processes client-side request on the server and then send the HTML difference back to the client.
Create Up A Blazor Application With IDE
For this example, we will demonstrate how to use the Visual Studio IDE to create a Blazor Application. Open your Visual Studio IDE after installation and create a new project.

In the Create New Project Dialog box, search for Blazor. Select Blazor WebAssembly App to create a Blazor client-side application or a Blazor Server App to create a server-side blazor application.
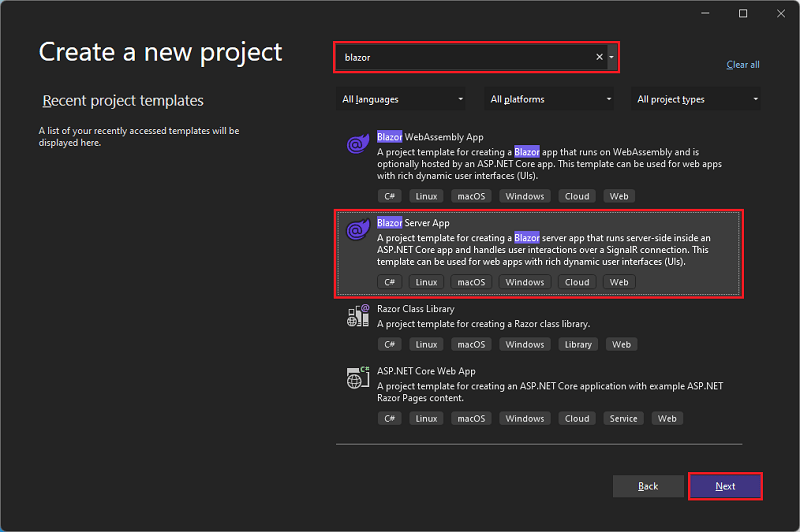
Click the next button to continue to the project configuration page. Here, you can name your Blazor application and select the target framework plus a host of other configurations.
Leave all default selections and click create button. This will scaffold your application into a solution directory.
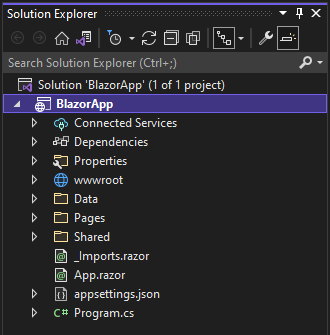
In naming your application, always begin the first letter in uppercase. This is more of a best practice than a rule. If your app name contains two or more words, write the first letter of each word in uppercase, as with our example
BlazorApp.
Create A Blazor Application With .NET CLI
You can the .NET CLI to convert a command-line application into a headless IDE to create Blazor applications. Examples of a command-line program includes Powershell and CMD on Windows and Terminal on MacOS and Linux.
Command line applications allow you to run commands and talk directly to the shell of your operating system. You may require administrator priviledges in some cases to run these CLI commands.
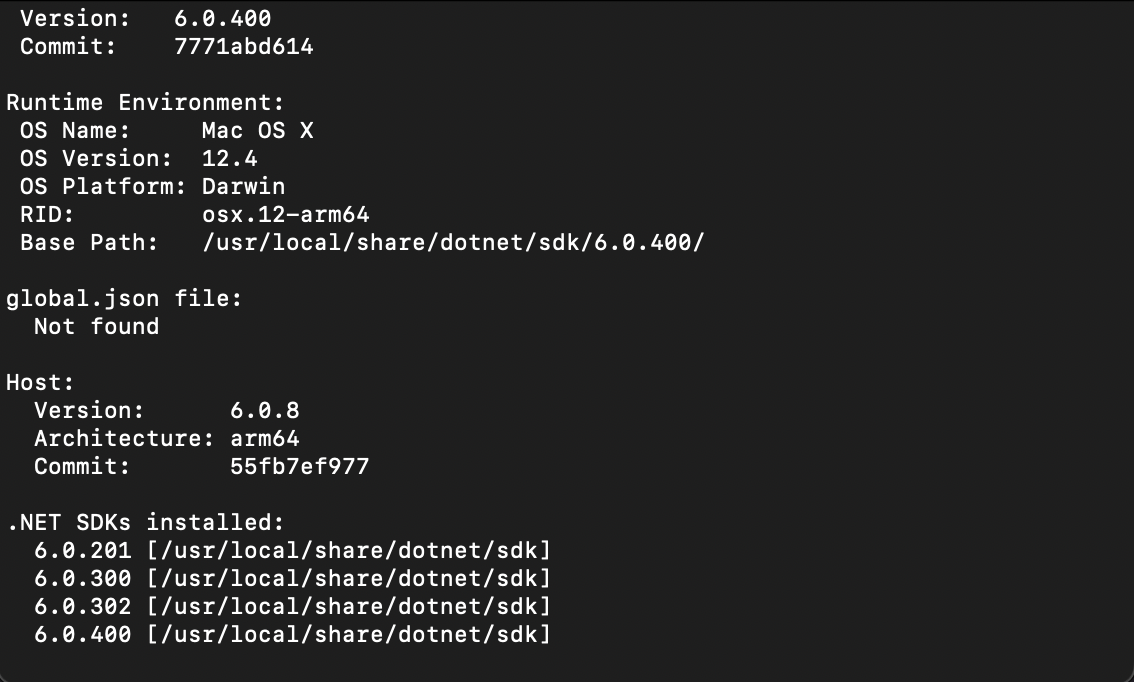
Create a Blazor WebAssembly or Server application by running the following commands respectively. To check if you have .NET installed, run the command dotnet --info to display all the information about your copy of dotnet.
Blazor WebAssembly
dotnet new blazorwasm -n BlazorWasmApp
Further Reading Exploring Web Assembly
Blazor Server
dotnet new blazorserver -n BlazorServerApp
The CLI executes the command in the working directory by default. Adding -n tag will create a new directory called "BlazorServerApp" as with our example and place project files in that directory.
You can now run code . command in the folder to open Visual Studio Code.
Visual Studio Code and other code editors will require additional setup and configuration to support your Blazor application.
Conclusion
With your Blazor project, you can now build client and server functionality using razor components. Fortunately, you do not have to build components from scratch as Blazorise has built and tested production ready components for almost any web functionality.
Read our documentation for more information or join our newsletter as we demonstrate how to implement Blazorise components and functionality into your projects.